 Chris Osborne Art
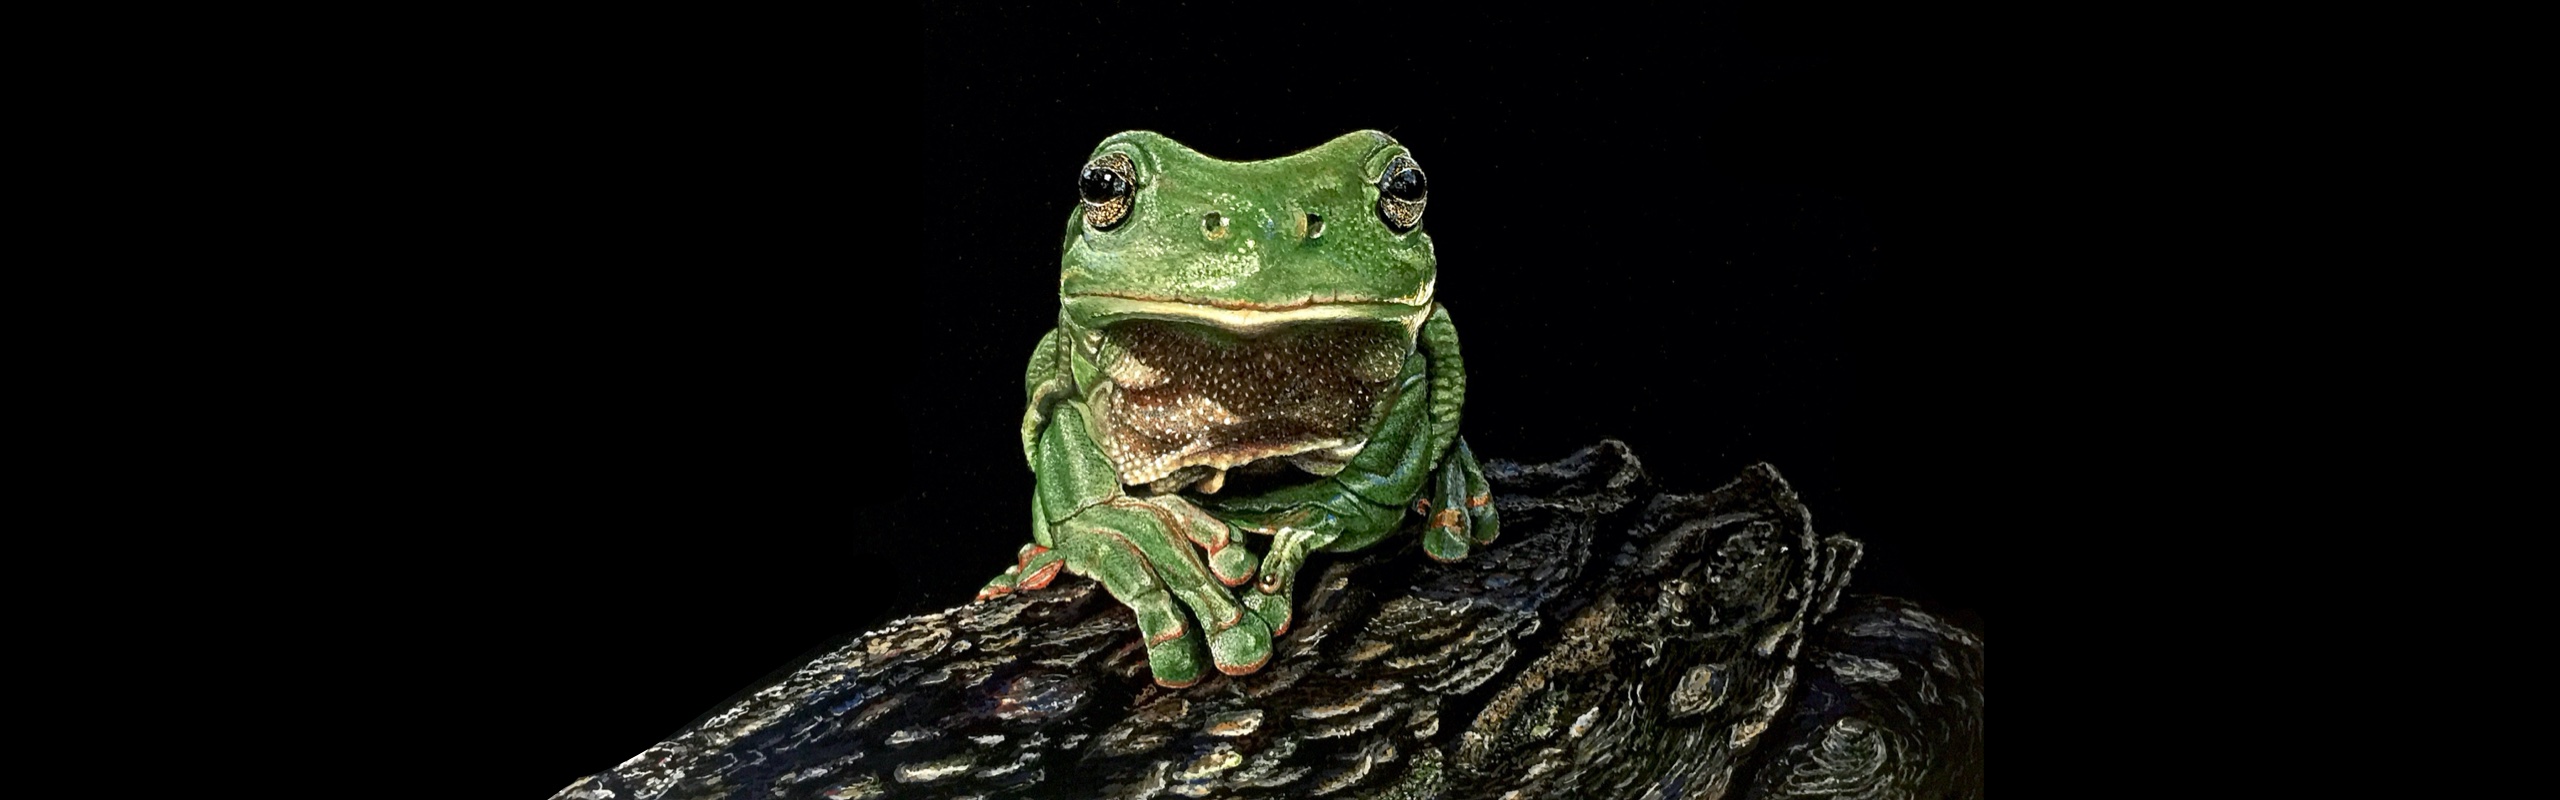
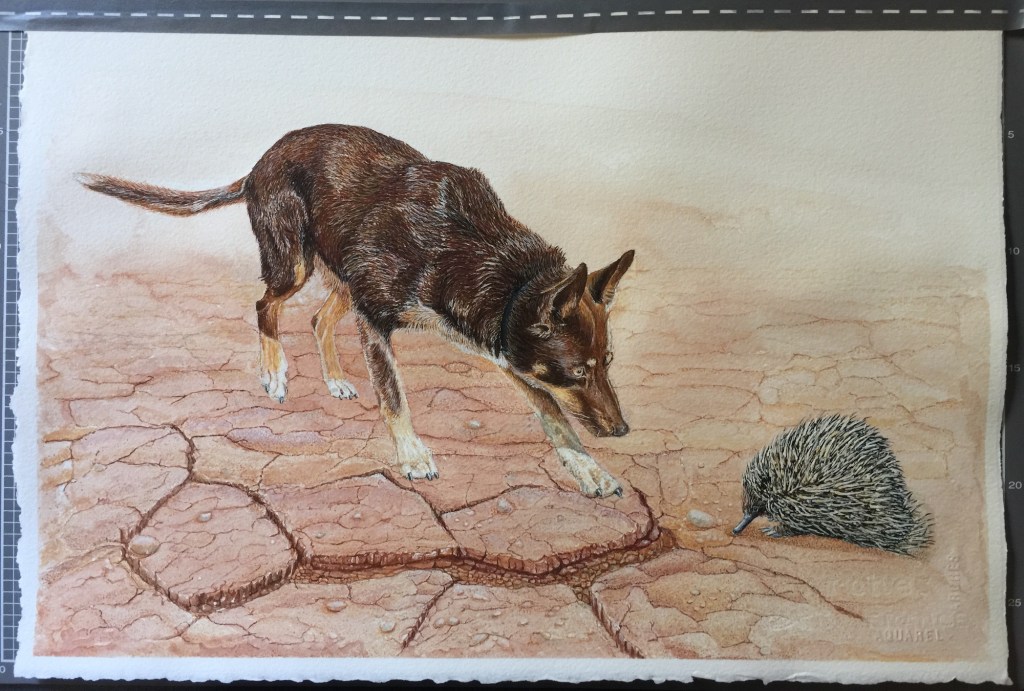
Trusty and Spike

The Story Behind the Painting
I was camping at Possum Park, just outside Miles, Queensland for a few nights and the owner fell in love with my art works and couldn’t wait to show me what she had in her converted train carriages.
Most of the converted train carriage walls were covered in d’Aarcy. W. Doyle prints and other artists.
It was such a beautiful thing to see someone else’s love for art and the encouragement she gave me to keep pursuing my dreams to become a better artist.
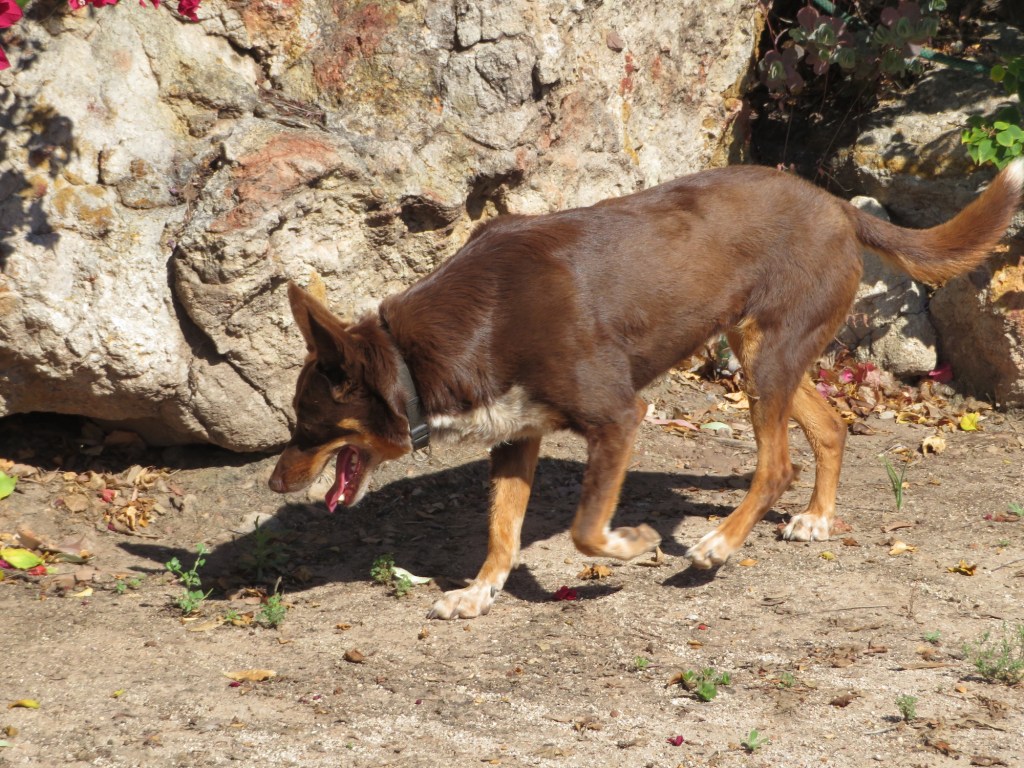
The next day Julies husband asked if I would paint Trusty their Australian Kelpie as a Christmas Present for his wife, but I had to keep it a secret. So after touring the plane thats now converted into accommodation I had to take some sneaky photos of Trusty without Julie seeing me.
Dave asked for Trusty fighting at a king brown snake on some red dirt, but later change it to looking at an echidna, which from my point of view was good but equally hard to paint.
So I guess you can kind of call this a Bush Christmas Story….. but keep it a secret, just incase Julie looks on my web page. I’m going to have to schedule this blog for Christmas Eve, don’t want to spoil the surprise now.
My Painting Process

So I usually start painting the background or the hardest parts of my painting first, this way it’s not too daunting to finish it.
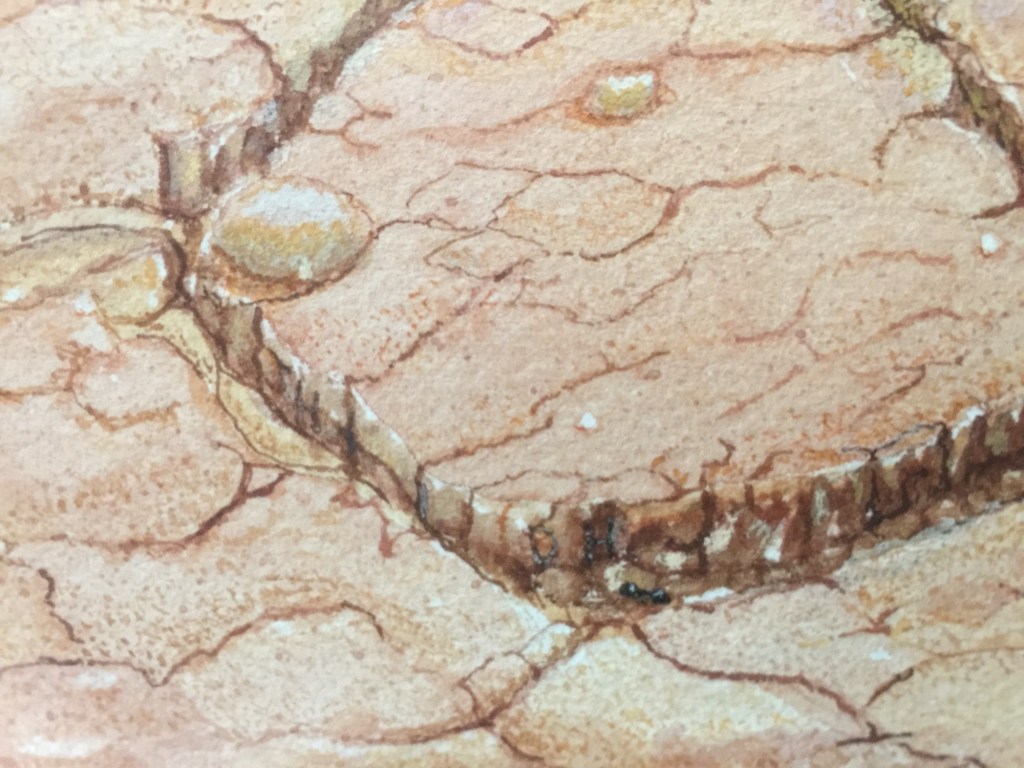
Since Possum Park was way out in the bush and very dry I decided I needed more than just plain red dirt. Looking through my photo I found one towards Cape York with beautiful red cracked dirt, perfect.
I asked Julie when they last had good rain and she said “Easter”, It’s now November so I want this painting to look very dry and sunburnt.
As you can see I painted a wash, starting light and getting darker towards the bottom of the painting. Then I started adding some cracks in the dirt to show how dry the land was.
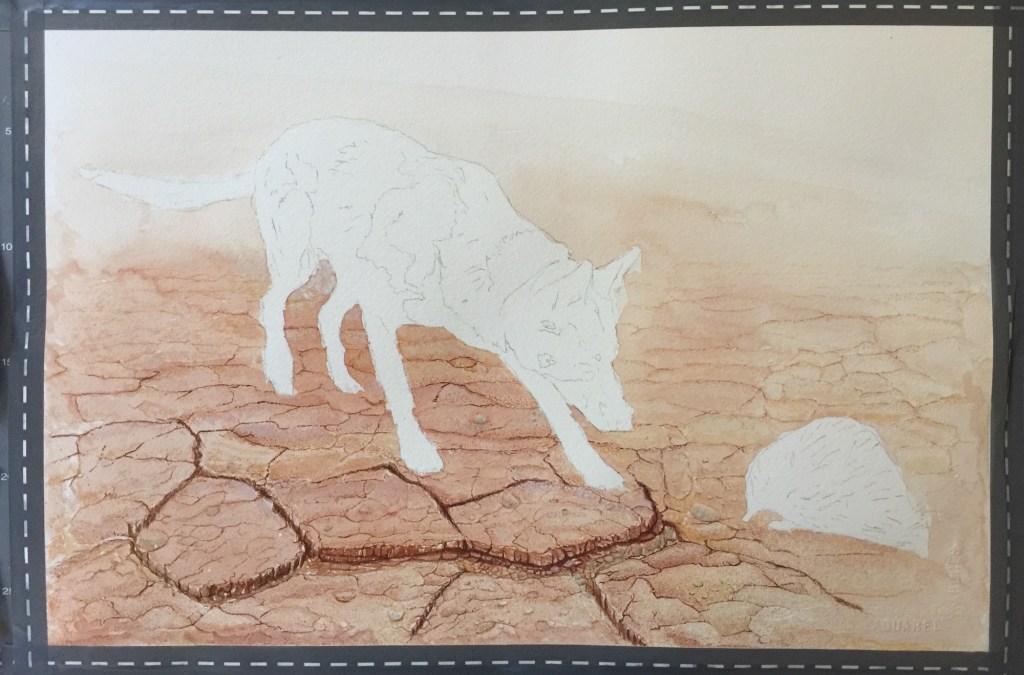
After this I started adding sand grains with my stippling brush, which also works well at cleaning air-conditioning filters just for your information. Then I start joining some of these sand grains together to make outlines for stones.
Since this was a larger A3 painting it took me about a day and a half to get to this stage with the dirt.
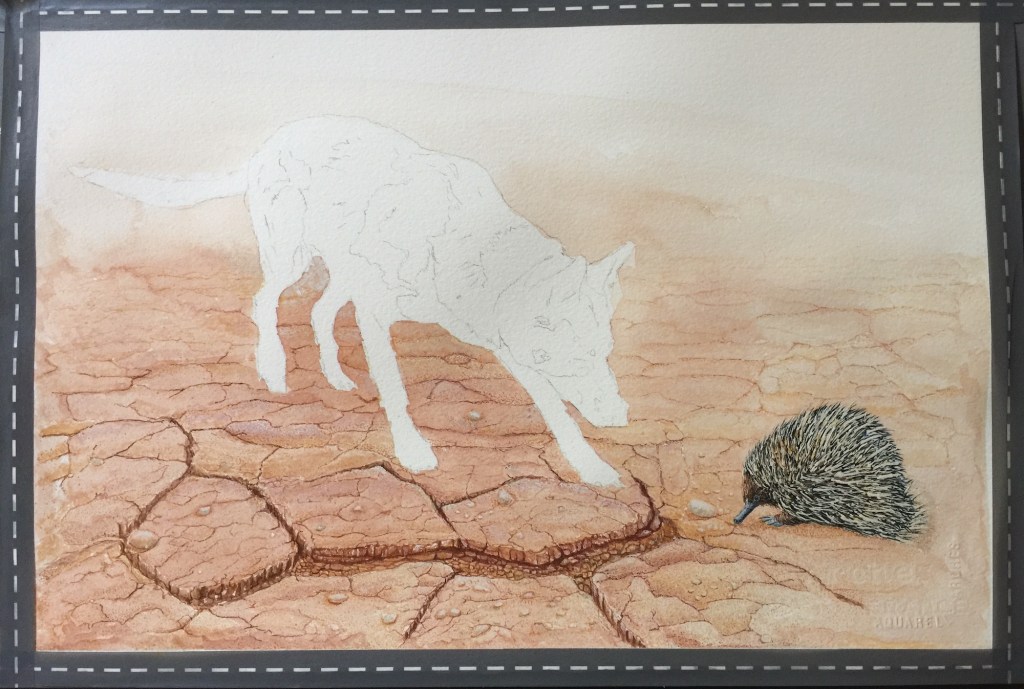
The echidna I photographed at Australia Zoo on an overcast day so it was lacking a shadow, this didn’t bother me as I had to match it up to the dogs anyway.
I was really worried about painting the echidna as it was too large just to paint it with a few brush strokes but not large enough to give full on detail in each quill.
I painted a brown ball then started adding dark spikes, followed by white spikes. After that I started darkening the ends and kept adding alternative light and dark spikes. Then to make it look more like a 3D ball I darken the spikes closer to the ground and added some shadows.
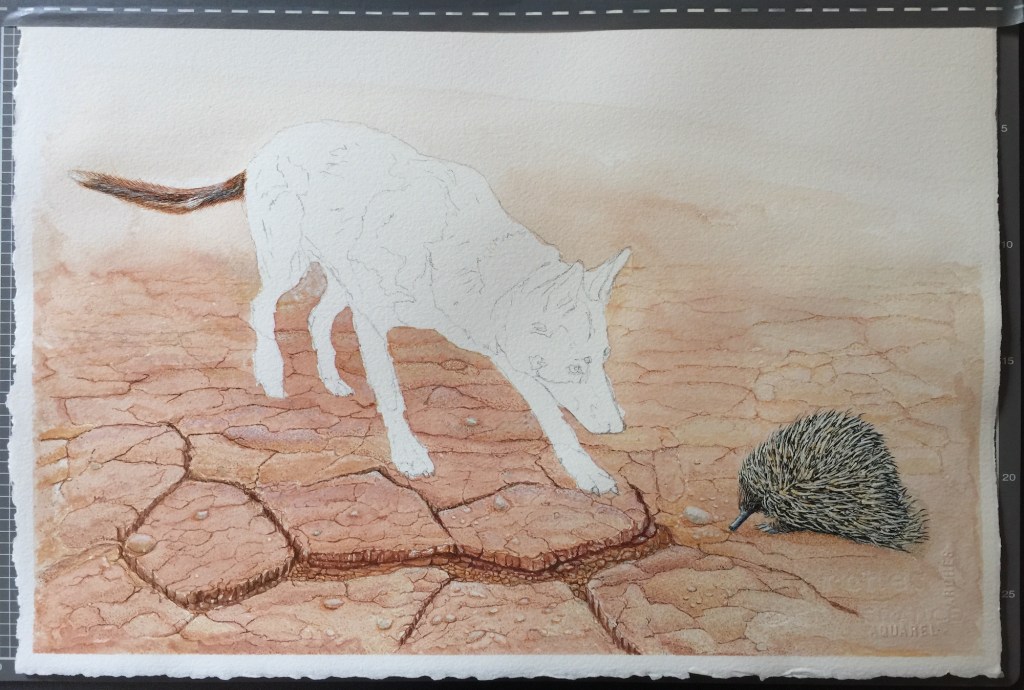
Time to work on the Trusty the dog, I started with his tail to see if I could get the colouring right. I was trying to get a colour close to the dirt but with more darker browns.

A quick few minutes gave me areas of highlights and shadow on trusty’s body and direction of hairs.
This is mainly for when you start painting hairs that make up the fur you don’t want white gaps.
I then start to darkening the whole body up as I find adding black at this stage just gives you way to much contrast.
Next I wanted to get stuck right into painting the face to see if I could get Trusty’s expression right. The face hairs are much shorter and finer than the rest of the body, so you have to take notice if what you’re painting. Not all the hair is in the same direction, or colour, take time to study your subject.
It’s much easier to paint something you have had hands on experience with. I’ve had a few dogs growing up so I know how it feels to run my finger through its fur and see how it springs back.

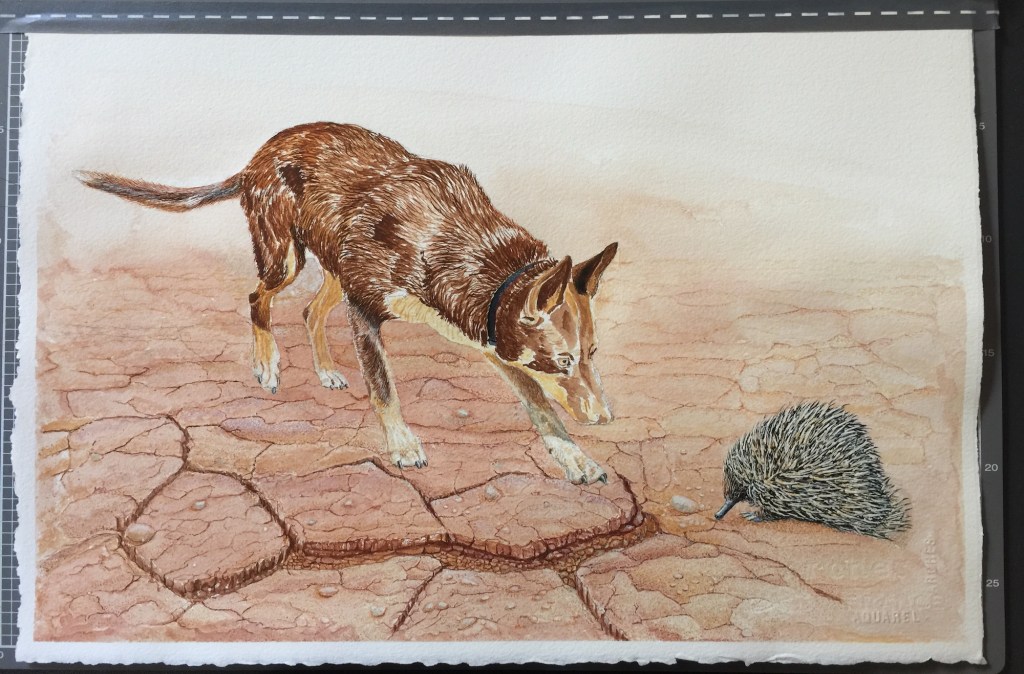
Time to build up the hairs on Trusty’s body, now this is very time consuming but you don’t paint every single hair but multiple layers of hair.
A layers of burnt umber, burnt Sienna, raw Sienna, red ochre, darkening where shadows fall and lighting were the sun reflects light.
Once you build up multiple layers, Trusty’s fur starts looking more and more like the photo. So it’s just a matter of making each section lighter / darker or more towards the brown or red side of the spectrum.
I found it a fine balance painting the white sheen on Trusty’s coat and not making it look like grey hair I must have re painted this about 4 times.

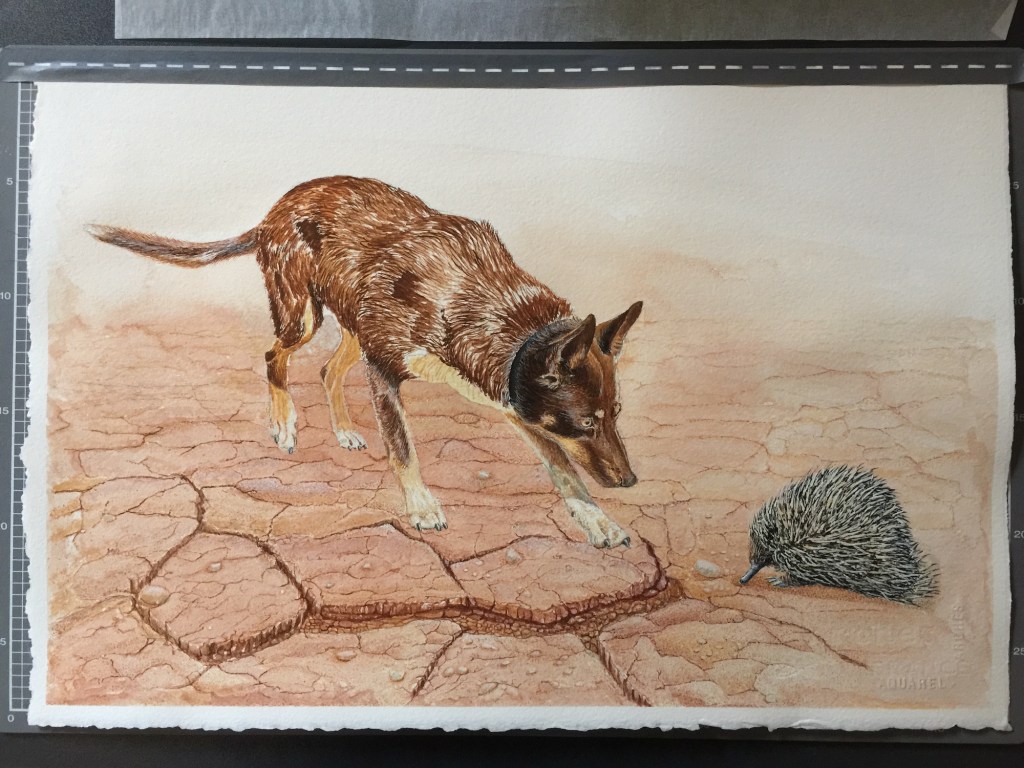
Time to paint a shadow and make Trusty one with the earth.
Now this did take me a while to paint as I thought a wash would make things a little dull and maybe smudge the under laying colours.
I decided that painting every dot was the way to go as I wouldn’t be able to keep controls of the paint using the stipple brush and some masking paper.
I also darken the back leg as this was also supposed to be in shadow.
Also of the 5 days it took me to paint this I kept re visiting the dirt playing with the stones and shadows and cracks.
Something I like doing is adding peoples initials into the painting and since David is giving this as a present I decided to add his too but not as prominent.
J H & D H

So this is the finished product all framed up and ready to hang, I really hope Julie like this Christmas gift as I know David is very happy with it and wants to sell prints at Possum Park.
Gouache Colour Palette
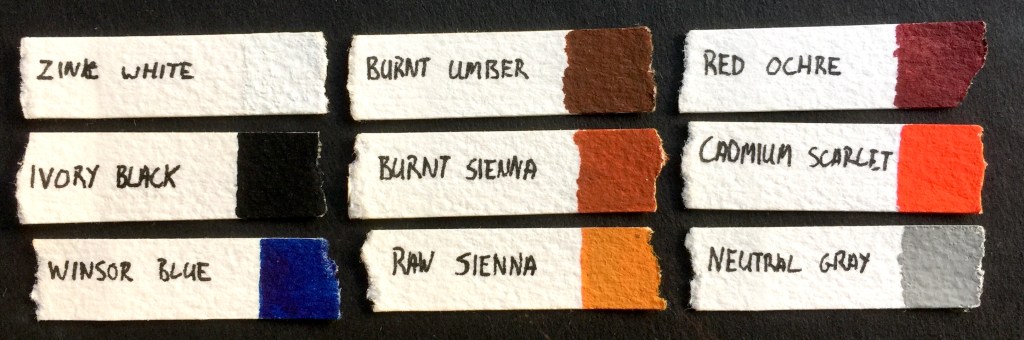
I use Winsor & Newton Gouache on Arches France Watercolour Paper, 300g Cold Pressed.
My painting come from my own experiences that I have lived and photographed while traveling. By reading this blog, you as a viewer can now hear The Story Behind the Painting. Where, when, what was happening while I was photographing the wildlife.
If you want more details about my adventures checkout my travel blog website www.ChrisOsborneAdventures.wordpress.com
Enjoy, Chris Osborne
