 Chris Osborne Art
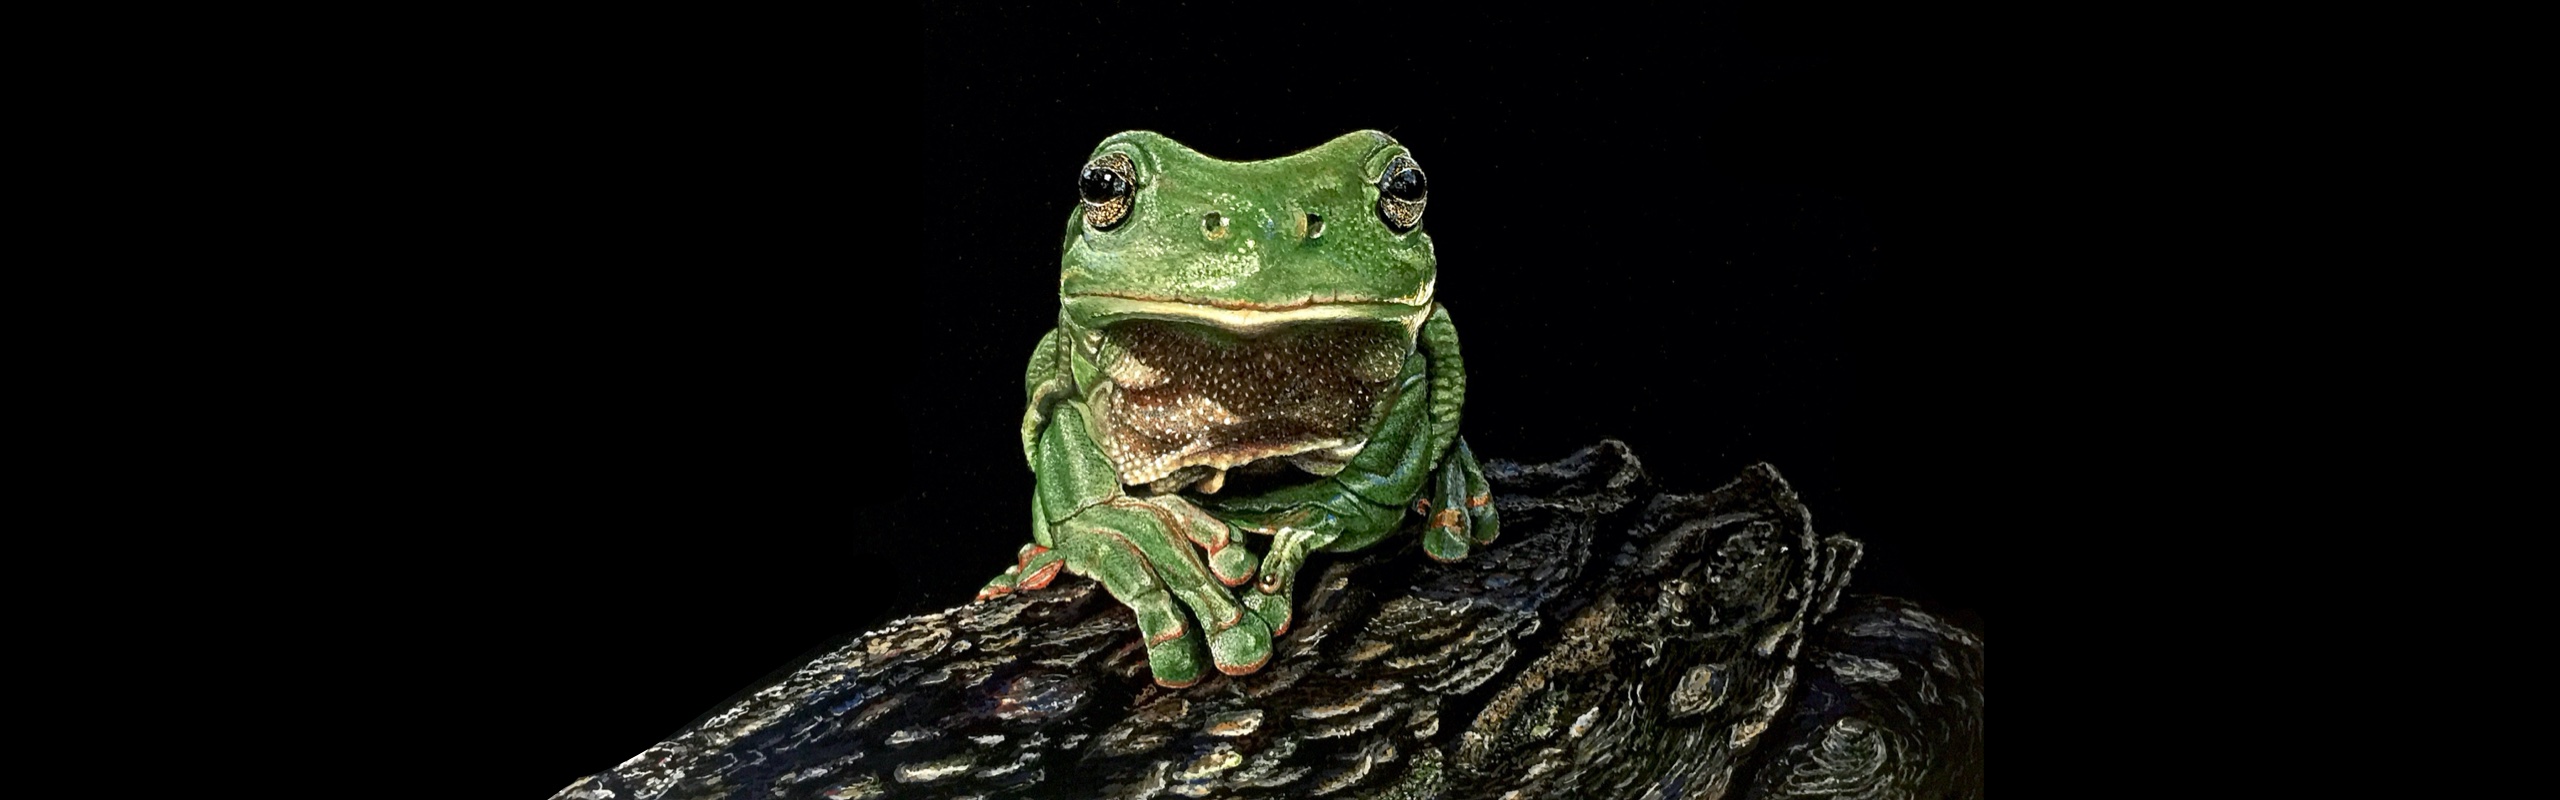
Teaching My First Art Class

The Story Behind the Class
People have approached me over the past few months asking if I was going to teach some art classes, so I thought this might be a good idea. I mentioned this to my local art group and gallery where I currently having an exhibition, I had positive feedback and was asked to put a quote together. This was approved and a few weeks later I taught my first art class at Dogwood Crossing in Miles.
Class Preparation
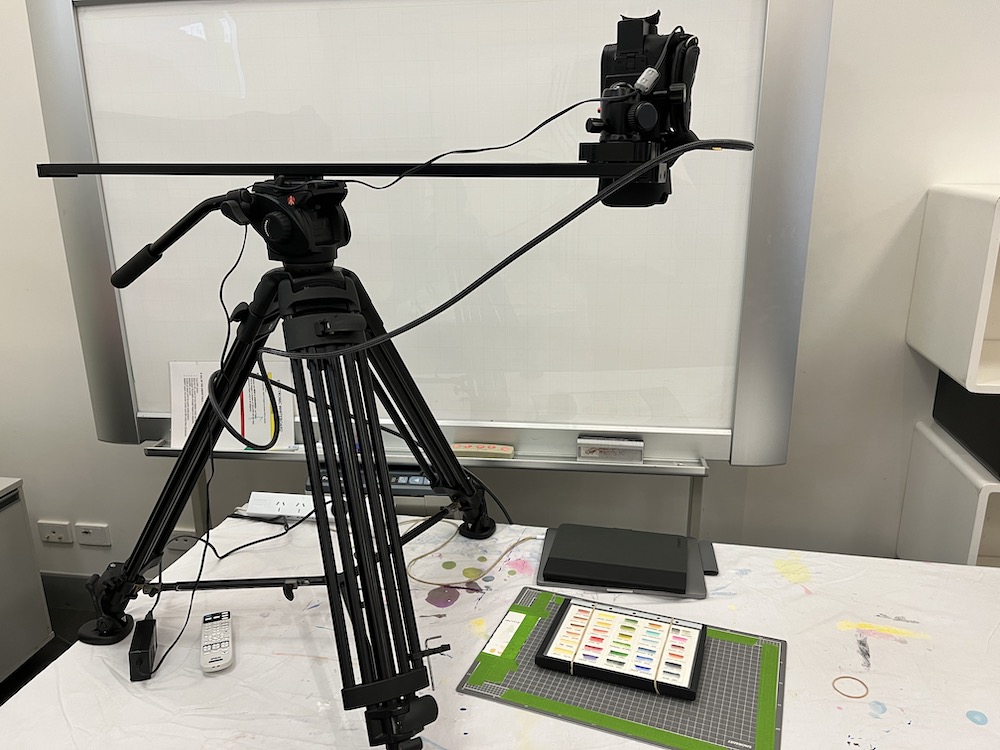
Once my quote was approved I decided to do a site visit and test out my video camera and computer equipment connecting to their projector. Luckily I did as I needed to buy a mini HDMI to HDMI connector to get it all working.
My idea was to paint as normal and project a live stream of this onto the wall, so I didn’t have 16 people crowding around me making me way to nervous.
This was also beneficial as I could zoom into my artwork and everyone couldn’t see the fine details I was painting.
This worked out perfectly as I could paint and students could look up from their work and follow along without having to physically move from their own setup.

I thought it would be a good idea to create a few exercises so students could get used to the gouache paint and small brushes before painting the black swan.
This was well received as most people had never used gouache before.

I thought back to courses that I have taken in the past and I would try to learn by watching and listening while madly taking notes that I could never read when I got home.
So for me it was essential that I created some structured handouts that were broken down into steps of painting a swan. This enabled students to reference them in class and also read them once at home as a refresher.
I actually created a second set of course notes for painting a black and white magpie just incase this class was successful and I taught again.

Since I had to put a quote together I was trying to keep each students materials below the price of the class fee of $20.
Additional papers, folders and handouts were also included that were not in this photograph.
This was also a good exercise in costings for future classes that I may hold in the coming months that aren’t subsidised by the council.

My little show bag of goodies for people to use in class and take home.
Folder, Black paper, tracing paper, glassine paper, reference photo, double sided notes, fridge magnet with my web address. in addition to this extra paper for two painting exercises, a kneadable eraser and a pallet with gouache to take home and practice a new skill.
Introduction to Gouache Course
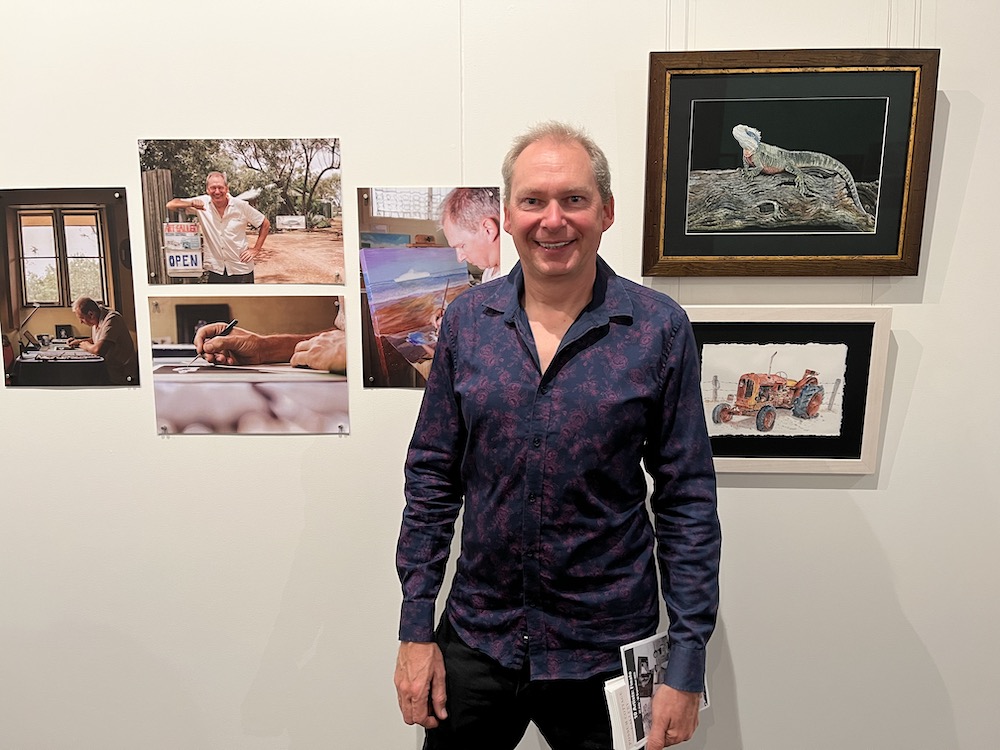
After my introduction and the course outline we went into the gallery to see a few of my artworks on display.
My Lizard, an eastern water dragon took around 50hrs to paint and is one of my most detailed works to date.
My watercolour tractor also sparked interest and the question was asked, would I be teaching a watercolour class in the future, hopefully yes.
Photo taken from exhibition opening night.
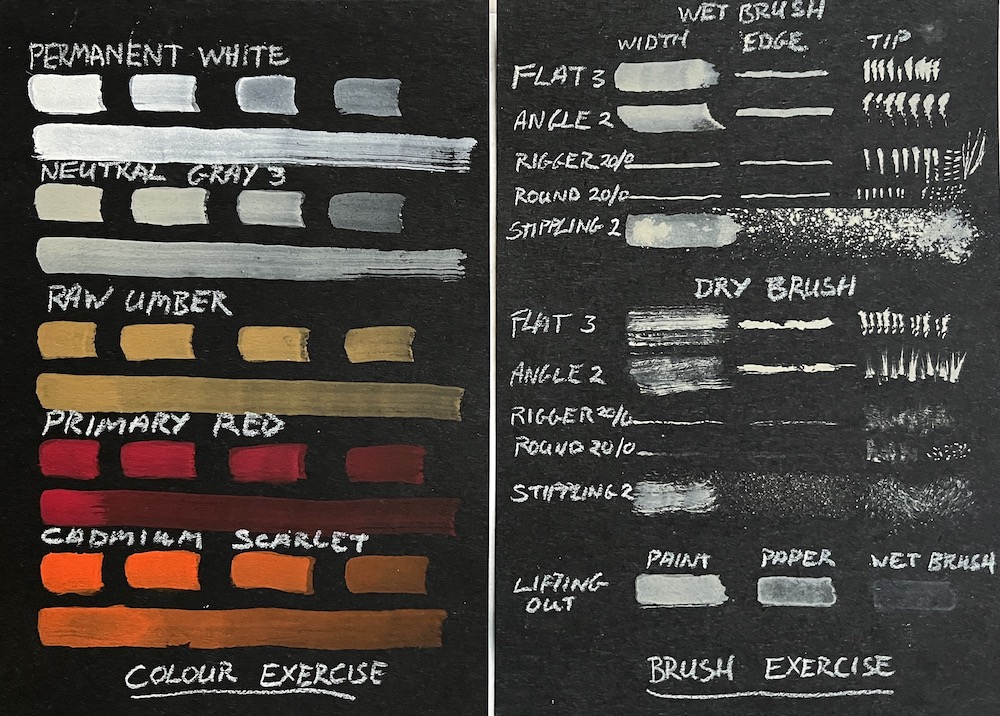
Since most people would not have used gouache and this was an introduction course I decided that we would start the lesson with two exercises.
First, a colour exercise to get students used to painting on black card and seeing how much the paint seeped into the paper. This surprised a few people as they couldn’t believe when the paint colour disappeared.
Four dashes of paint were placed on the paper with a wet brush. Then the first three were panted a second time and then the first two a third time and the first one a fourth time. This built up the layers of paint.
The second exercise was getting a feel for different brushes and using the width, edge and tip of the brush.
First using wet paint then using the same order of brushes but with very little water and an almost dry brush. Last of the brush exercises, was an example of fixing a mistake. Add three dabs of paint and removing one quickly with a paper towel then the last one with a wet brush and paper towel.

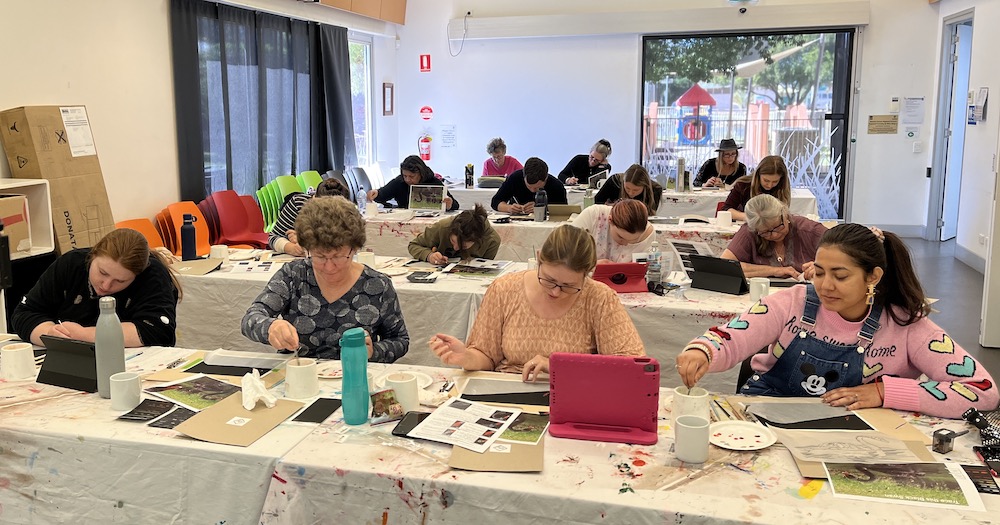
My table setup for teaching the class using the same materials the students were.
The video camera was setup directly above my workspace and projected onto the wall so students could follow along in realtime as I explained my swan painting process.
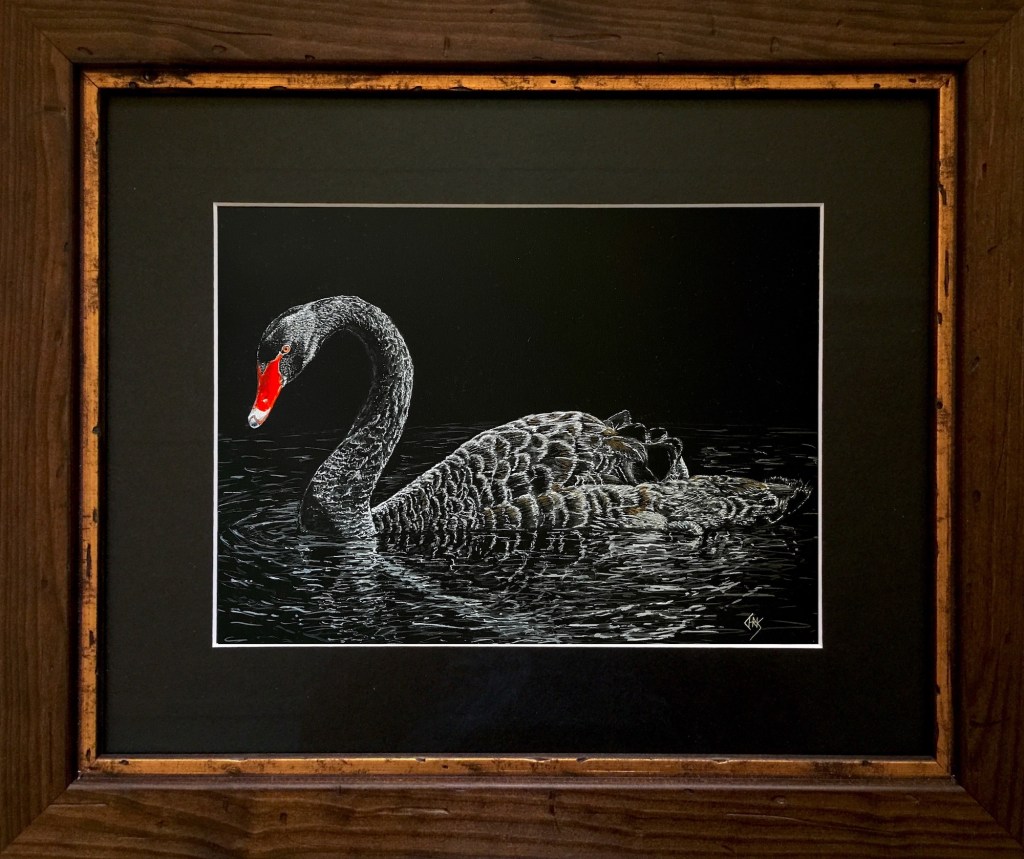
This is the finished black swan artwork that my course was based on.
I chose another photograph of the swan that I had taken a few seconds later so it had a slightly different pose to my previous painting and my prints.
There is more detail in this artwork because it took me over 12hrs to paint as apposed to the 4hrs I taught in class.
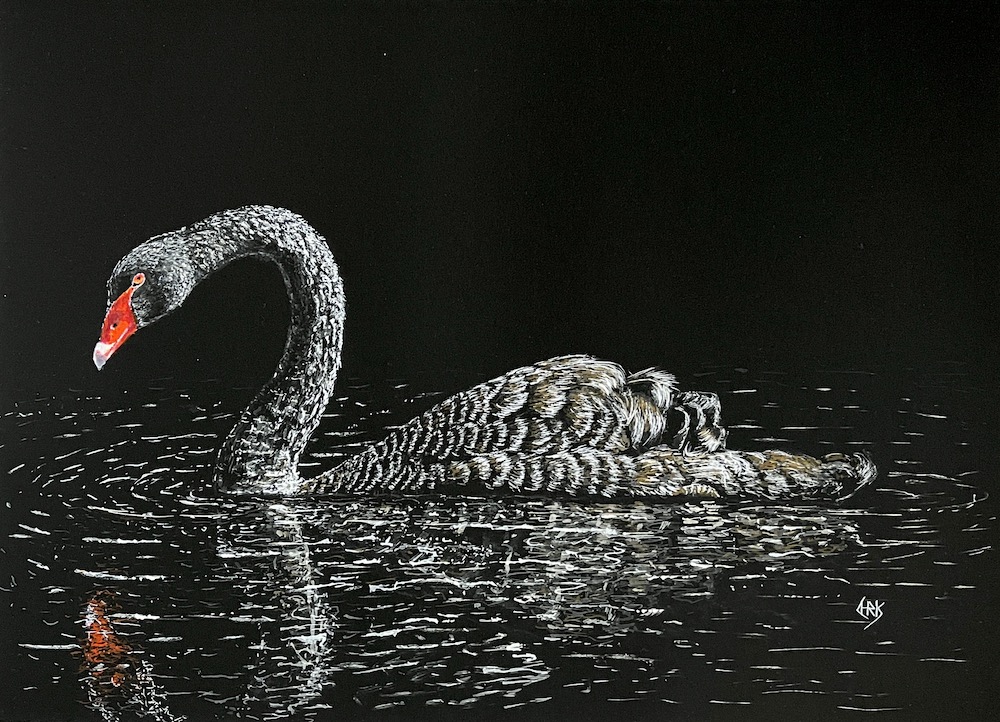
This is my black swan from class after I worked on it for a few hours at home.
What I didn’t realise in class was the swans head was much closer to the water than the previous swan I had been copying. So its head and bill needed to go into the reflection.
It just goes to show sometimes you can’t see the obvious even if its right in front of you.
What did I learn from teaching
Unfortunately when I was purchasing materials the art shop didn’t have 16 sets of four different brush types, which was ok as only 10 people were booking into the course, however next time I asked 15 people were booked into my class. So people did have to share a few brushes between their table but I will slowly build up a bigger supply of brushes.
I did forget to ask peoples names and share their painting experience as I strayed off my lesson plan because of some pencil adjustments I made the night before. Also my timing was thrown out once we discovered the local cafe closed at 11am on a Saturday so purchasing of lunch was moved from 12 to 10:30am.
I must say that I thought the class went really well and people said that they were having fun throughout the day and wanted me to teach more classes. It was also asked if I teach private lessons so i’m considering this as an option too.
So really what more could you ask for, I was very proud of each and every student that took my class.
Materials List
Winsor & Newton Gouache Colours
Permanent white, Neutral grey 3, Raw umber, Primary red, Orange lake deep in place of Cadmium scarlet.
Paper
Colour exercise – Stonehenge Aqua Black Watercolour paper
Brush exercise – Black 100% post-consumer recycled paper from ecocern.com
Black swan – Black Colourfix Art Spectrum Paper or Black Canson Mi-Teintes Touch Pastel Paper A3 cut in half.
Brushes
Flat 3, Angle 2, Rigger 20/0, Round 20/0, Stippling 2
Eraser
Faber-Castell Kneadable Eraser
Pencil
HB, but 2B or higher better for tracing
White Rembrandt polycolour Lyra
Paper Towel or Napkins
Anything in the kitchen
Art Palette
Paper plate used so students could take home a bit of gouache to finish painting off.
Masking Tape
Frog Tape seems to work well at holding the paper down and when using watercolour no paint seems to seeping under the tape leaving you with a nice sharp edge.
Art Suppliers I Use
Arts Plus – Bundaberg QLD
Wide Bay Gallery – Maryborough QLD
Artsup – Kingswood NSW
Chris Osborne Art

Congratulations and good luck with your art class!
LikeLike
This is fabulous, Chris. Thanks for sharing your experience. You could also include a feedback sheet for students to complete and leave with you before they go – rate the course content, what would you say to others considering doing this course, (optional) name & email address if you’d like to get on my mailing list.
Well done on your first class. Here’s to many more!
LikeLike
Yes I was going to do one but the gallery that organised it are going to send a follow up email with a link to this blog.
I was also going to get people’s social accounts on the white board but things just ended rather quickly once I finished the swan and got a group photo.
LikeLiked by 1 person
Had a great time and learnt a lot from you Chris! Thank you for your patience and look forward to any workshops you may hold in future. Best regards Bernice
LikeLike
Thank you so much for commenting and viewing my website.
Your welcome and I’m trying to organise some more workshops sometime in the future
LikeLike