 Chris Osborne Art
Camino Marker

The Story Behind the Painting
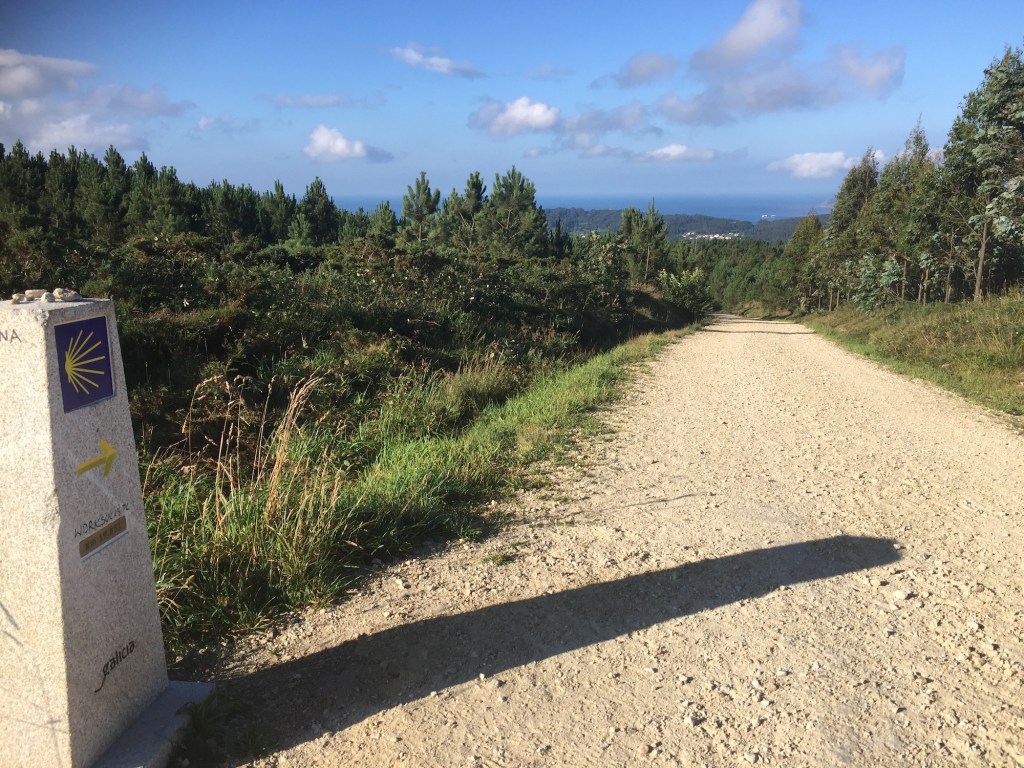
Mostly when I paint it’s in silence and I just listen to the environment and birds around me, this often transports me to distance places. So I thought how about I paint one of those distant places and one of the best experiences I’m my life. This was the Camino de Santiago, which I walked in 2014 with my mother and in 2018 with some of my fathers ashes. You can read more about this on my other website if you like. Chris Osborne Adventures.
I have painted a few landscapes from the camino and this time I wanted to paint a iconic part of it. The camino marker, something you’re always on the look out for and so happy when you find one. They mark your way along the camino and come in all different shapes and sizes, which they’re trying to create a standard for with these new markers.
My Painting Process
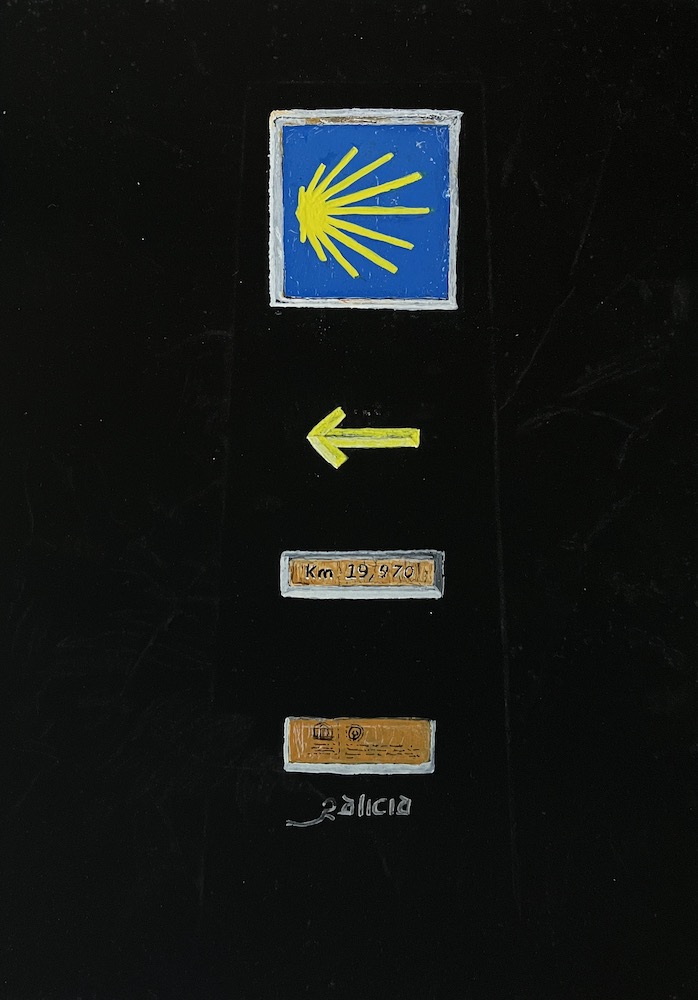
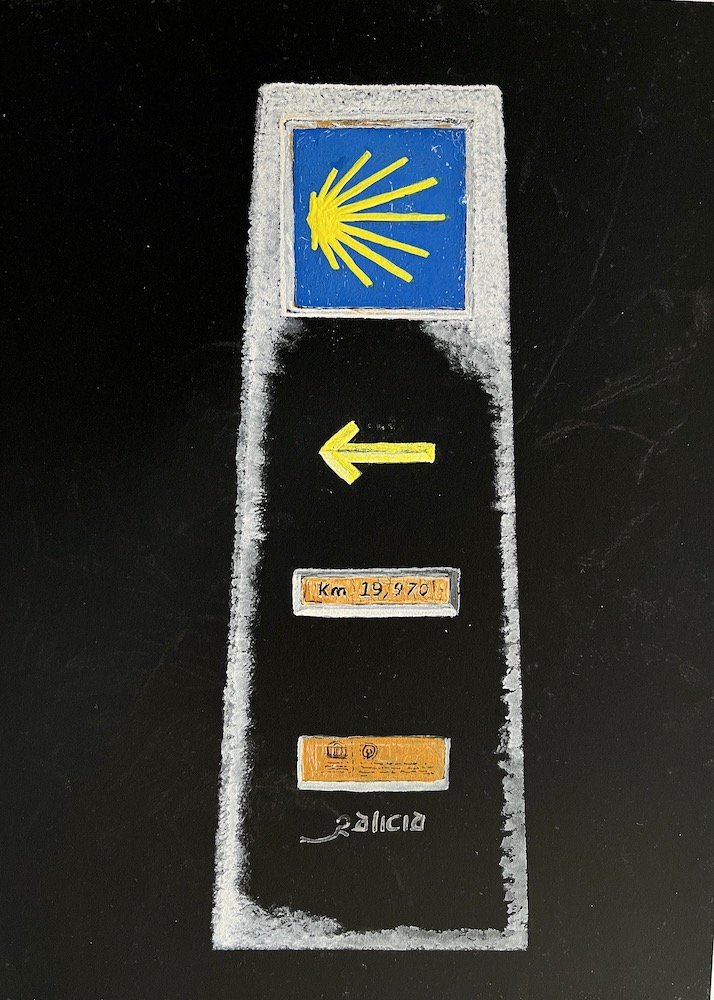
With an outline I’m ready to start painting, I start from the top of the page with the yellow shell on a nice sky blue tile. This was lots of fun to paint with all of its scratches, chips, dirt and even a few spider webs.
Next I worked my way down to the engraved yellow arrow, which was a lot more difficult than it looked trying to get the right shadows on the chiseled edge.
Next were the two brass plaques one with the distance left to walk in kilometres 19,970 which in Australia I think would have been 19,970m or 19.97km. This used to annoy me each time I saw it as I don’t think I had it in me to walk 19 thousands km.
The last plaque was the region that you were walking through, I think.
Next I had to remember the technique for painting white stone as I’d only done this on a small scale before.
As it turned out, just fill your brush with white paint and stab the paper in a downward motion, easy.
When I’m painting to keep the black paper clean I use a kind of grease proof paper to rest my hand on, I forget the correct name for it.
Anyway I used the edge of this up against the marker and dabbed paint on the paper and the overlap on the paper. Once removed this gave me a straight line without the use of masking tape.
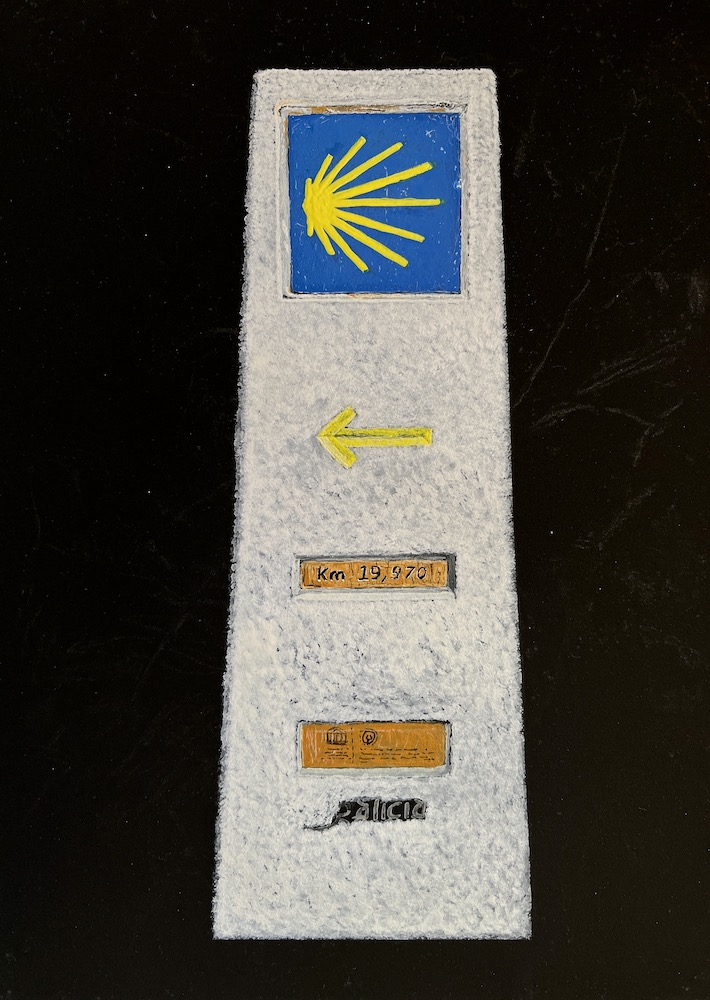
The rest of the Camino marker painted and just the Galicia engraving to paint.

Now to make the stone a little more weathered and believable. I started by adding darker greys to make the stone look like it had pits and chips.
After this I started introducing colour, browns, blues for dirt and green for mould. More concentrated colour and dirt down the bottom of the marker where dirt would naturally have splashed back up in bad weather.
This is what I call attention to detail, adding little stains on the marker at the edges of the plaques and under the tile.
Now to start putting this marker into some kind of an environment by adding a few stones for it to sit on.
At this stage it looks like the markers is photographed at night under a spot light.

Time to make the painting come alive, this was definitely my favourite part of the painting where you suddenly make the background creep forward and come out into the light.
I hadn’t really painted many ferns before so this was going to be interesting, I always get a little scared once I complete the main subject then start working on the background just incase I mess things up. This artwork was a little different as the background was more complex that the main subject and would come with its own challenges.
How many different types of ferns and grasses can I paint and how long will they take was my next thought.
So I just started painting them in roughly to get a feel for where everything would go. I know I copy off photos but when you’re working with something this complicated you end up painting what looks good.
I also painted a few rocks on top of the marker which seems to delight some people, I’m not quite sure what this obsession is but most markers have piles of stone on top of them.

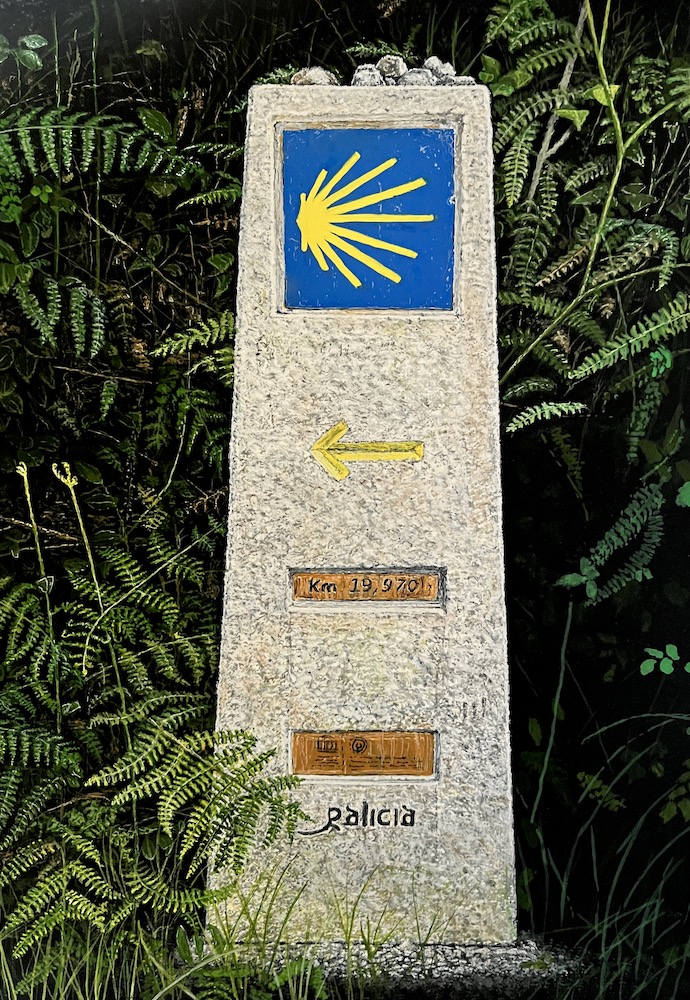
On the left hand side of the painting you can see that I have more or less finished the ferns with highlights and shadows, making each fern darker as it sinks into the shadows and lighter where it reaches out into the light.
On the right hand side you can see the undercoat colours of where I will be painting the ferns.
I did discover one thing that Winsor green is the most useless colour and that it doesn’t resemble any natural plants that I have seen. So I added some water to my paint brush and lifted this colour off the paper by dabbing the wet paint with a kitchen towel.
Next time I order more paint I must order a larger range of greens as I really don’t like mixing colours that much.
Even thought painting all these fern fronds was time consuming I really enjoyed the process. Unlike all the pink flowers on my butterfly painting. It’s funny that some tedious and repetitive subject become annoying and other become soothing.
More and more ferns and a few other plants with different shaped leaves added in and the last of the winsor green removed.
I started to add some grass down the bottom of the page an a little dirt and sticks in the background for some depth.
Always be mindful to add blades of grass and ferns behind the marker to connect both side of the painting together. Also beware of ferns in front of or touching the marker, this gives the artwork depth.
Look closely not every thing is perfect, some leaves are brown and dying off, other have been broken or eaten, make the painting look real and not perfect.
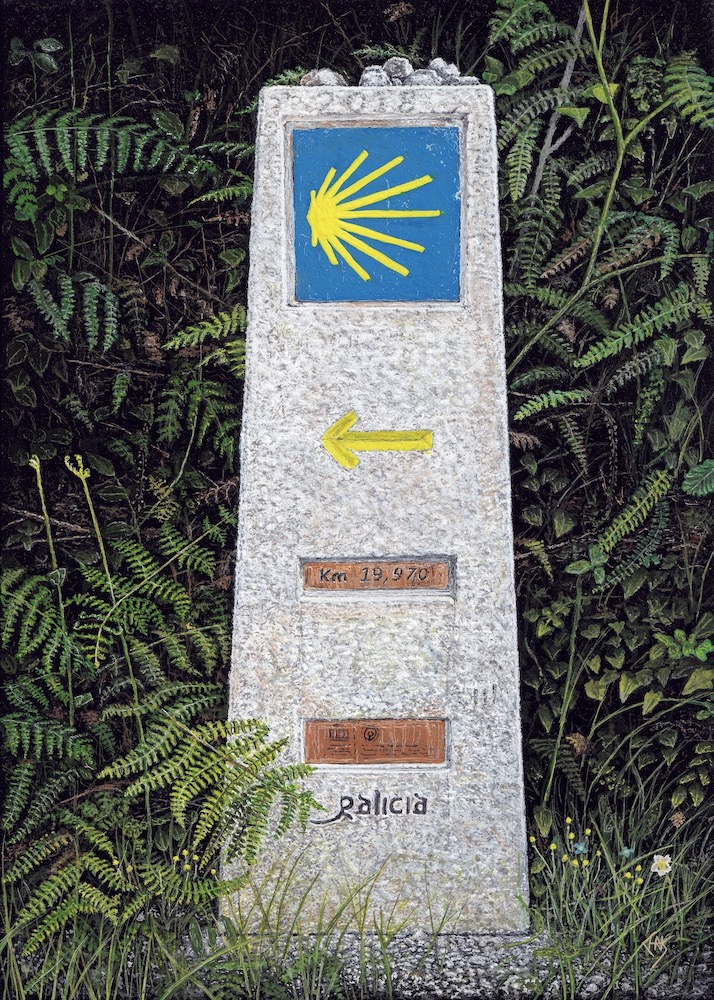
The camino marker usually has some kind of graffiti on it, I decided not to add this as I think its a bit disrespectful and annoys me greatly. However I did paint the year I walked the camino on the very top 2018 and made it look like a bit of graffiti.
This photograph is scanned in and looks more like the real thing, the greens are more subdued than the iPhone photos.
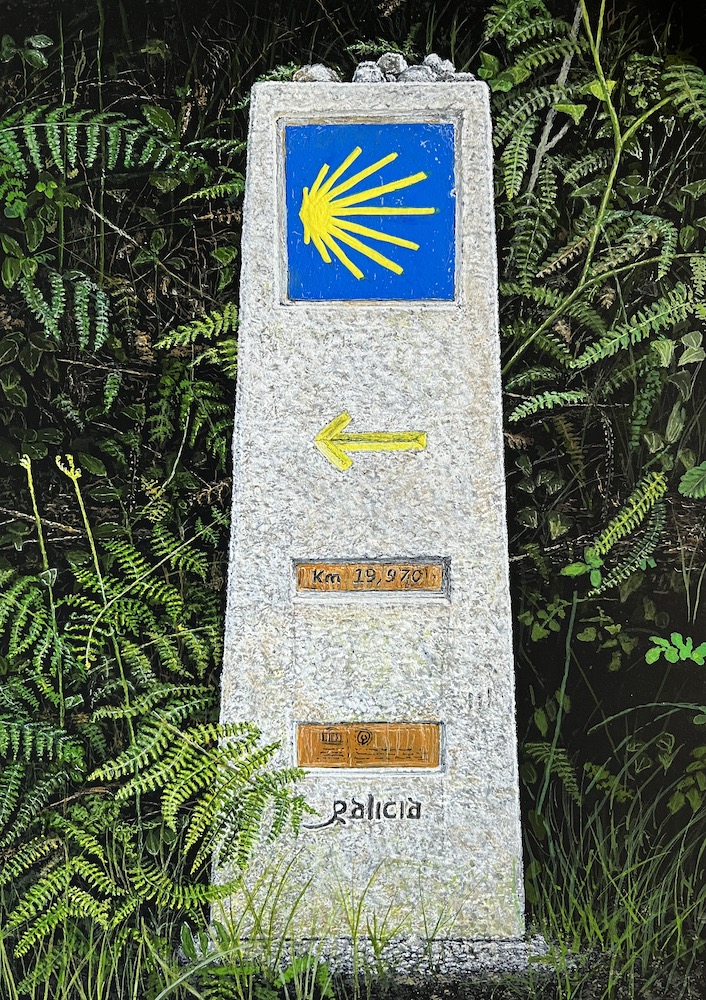
Time to add a few little flowers and dull down the white stones at the base of the marker and correct any shadows and anything else I have spotted.
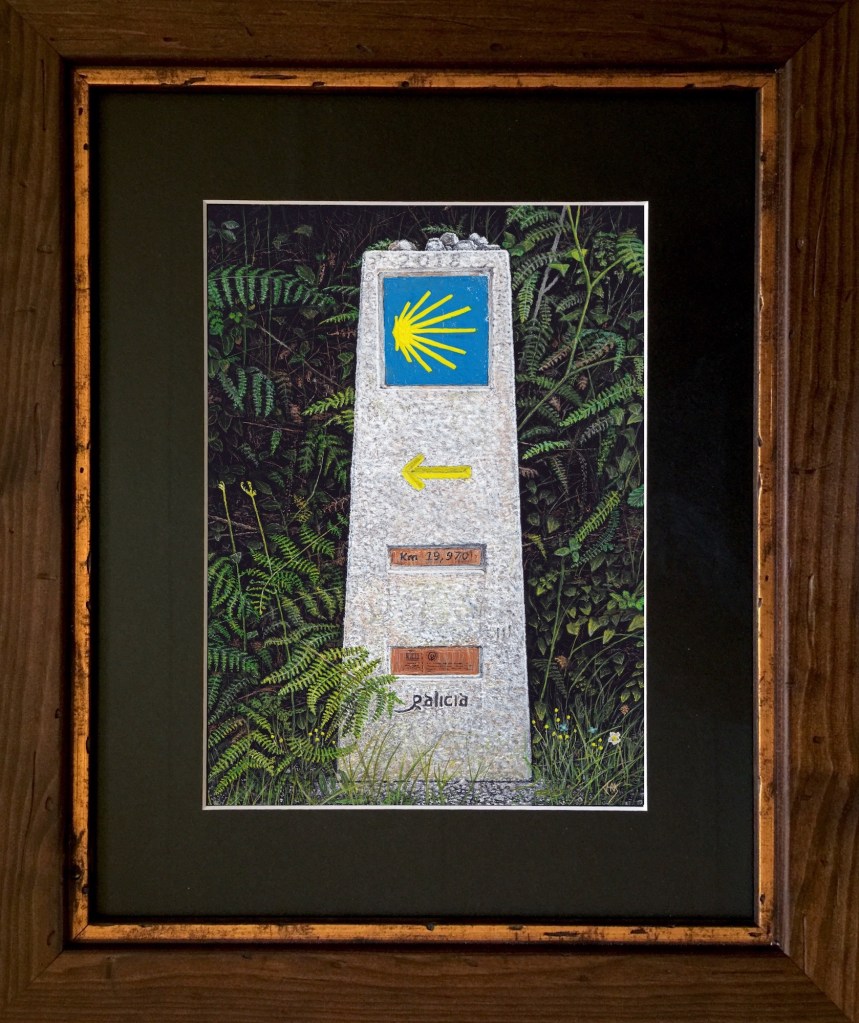
Finished artwork framed up in none reflective glass and will be available to view in my up coming exhibition Surrounded by Nature in Miles art Gallery.
I’m also having 30 signed limited edition prints made of this camino marker that will be available end of July.
Gouache on Canson Paper
For my Black Label collection I use Winsor & Newton Gouache on Black Colourfix Art Spectrum Paper or Black Mi-Teintes Touch Canson Paper.
My painting come from my own experiences that I have experienced and photographed while traveling. By reading this blog, you as a viewer can now hear The Story Behind the Painting. Where, when, what was happening while I was photographing the wildlife.
If you want more details about my adventures checkout my travel blog website www.ChrisOsborneAdventures.wordpress.com
Enjoy, Chris Osborne

Beautiful work!
LikeLike